
Push-ups are one of the most fundamental strength exercises that you can do. Few bodyweight movements have the potential to develop musculature and improve strength in the upper body and trunk as effectively. Former NFL running back Herschel Walker has said that throughout his career he would do up to 1500 push-ups a day, and that all of his training came from calisthenics. Is he lying about that last part? Who’s to say? Whether or not he did exclusively push-ups, his proficiency with them is emblematic of how functional they can be in developing full body strength. You don’t have to be an NFL Player; push-ups are invaluable for all populations. Whether you’re trying to get that first rep or get yourself to 1500, these next two posts are for you.
The Perfect Push-up:
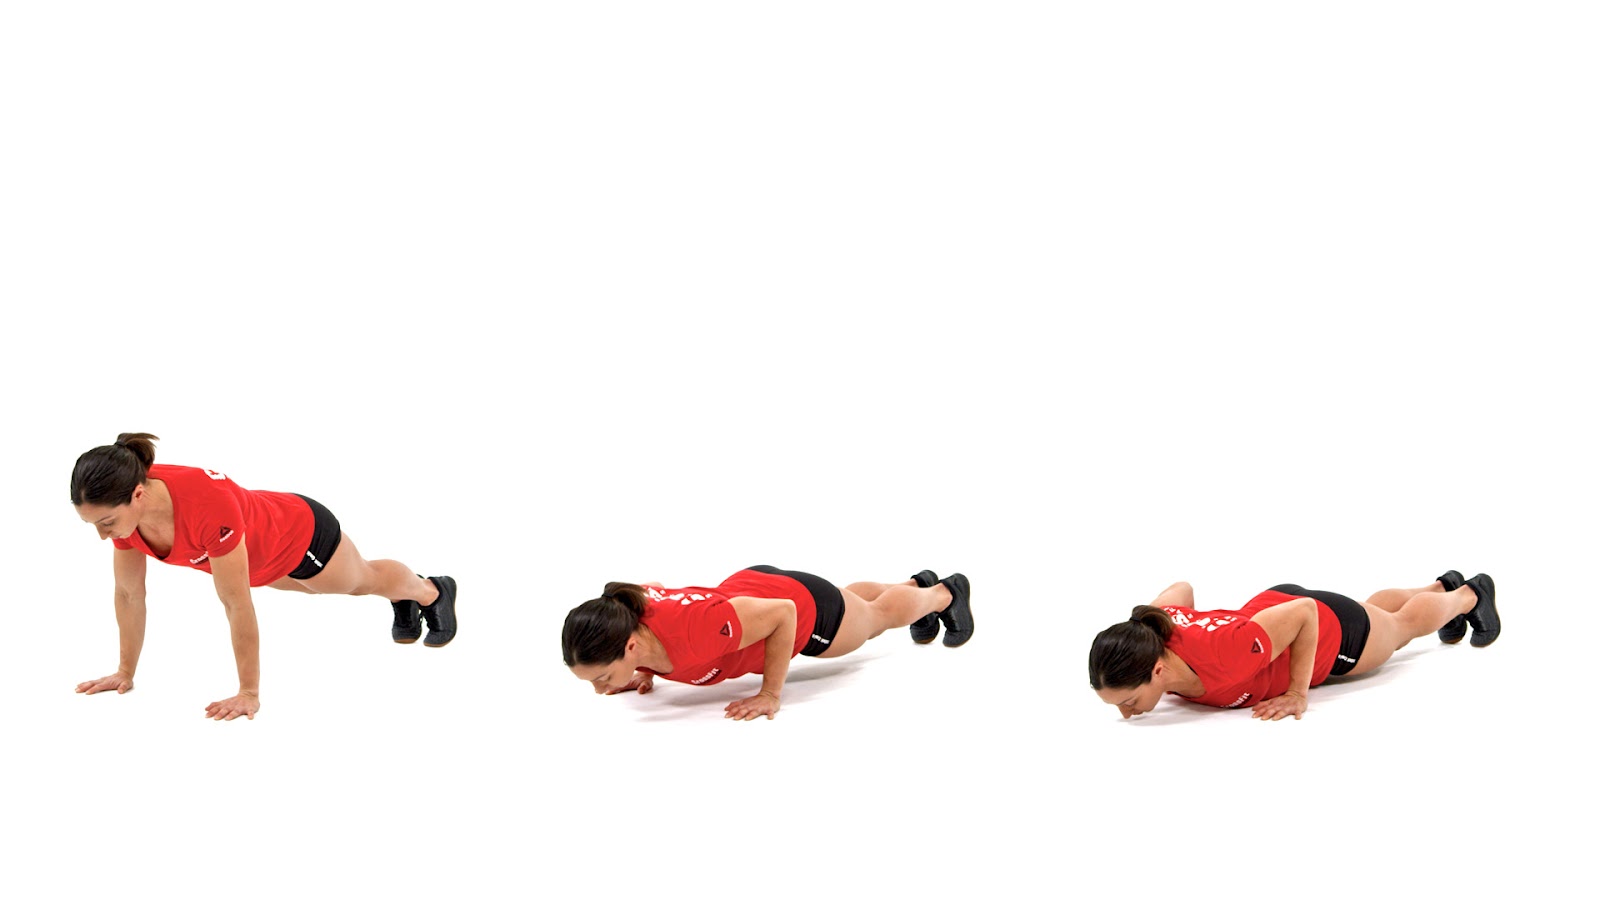
Before we dive into different progressions, let’s take a look at what a good push-up looks like and why it’s so effective.
- Hands shoulder width and in line with the chest.
- Neutral head.
- Vertical forearms throughout the movement.
- Body in a straight line plank.
- Belly and glutes tight.
- Elbows close to the body.
- Shoulder blades “pinched” at the bottom of the movement.
The example above illustrates all of these key points. In the first image, we see the individual in a perfect straight line. As her body descends to the bottom, she remains in that straight line and brings her shoulder blades together. Additionally, her elbows stay in tight to her body, and her chest is ultimately the first thing to touch the floor. You can look at these images in reverse to visualize how she’ll get back up.
The Most Common Errors:
When we teach this exercise in Onramp, many of us like to refer to it as a plank in motion. All you’re doing is bending through the arms and shoulders while your body stays in a perfectly rigid plank. The premise is simple enough to grasp, but the execution can be difficult. Every time you ascend, gravity wants to push your hips and belly down; resisting this tendency comes from strengthening of the abs and glutes to help maintain the rigid trunk. Whenever you’re put into a position that your body isn’t strong enough to hold, it will try to naturally compensate by reducing the load on the weakest point of the system. Allowing your hips and lower back to lose their position is your body’s way of taking load off of your shoulders. Understand that if you’re going to do your push-ups with your hips falling to the earth throughout the movement, you’ll likely get very little out of them.

Note the difference in hip position relative to the shoulders.
This is garbage.
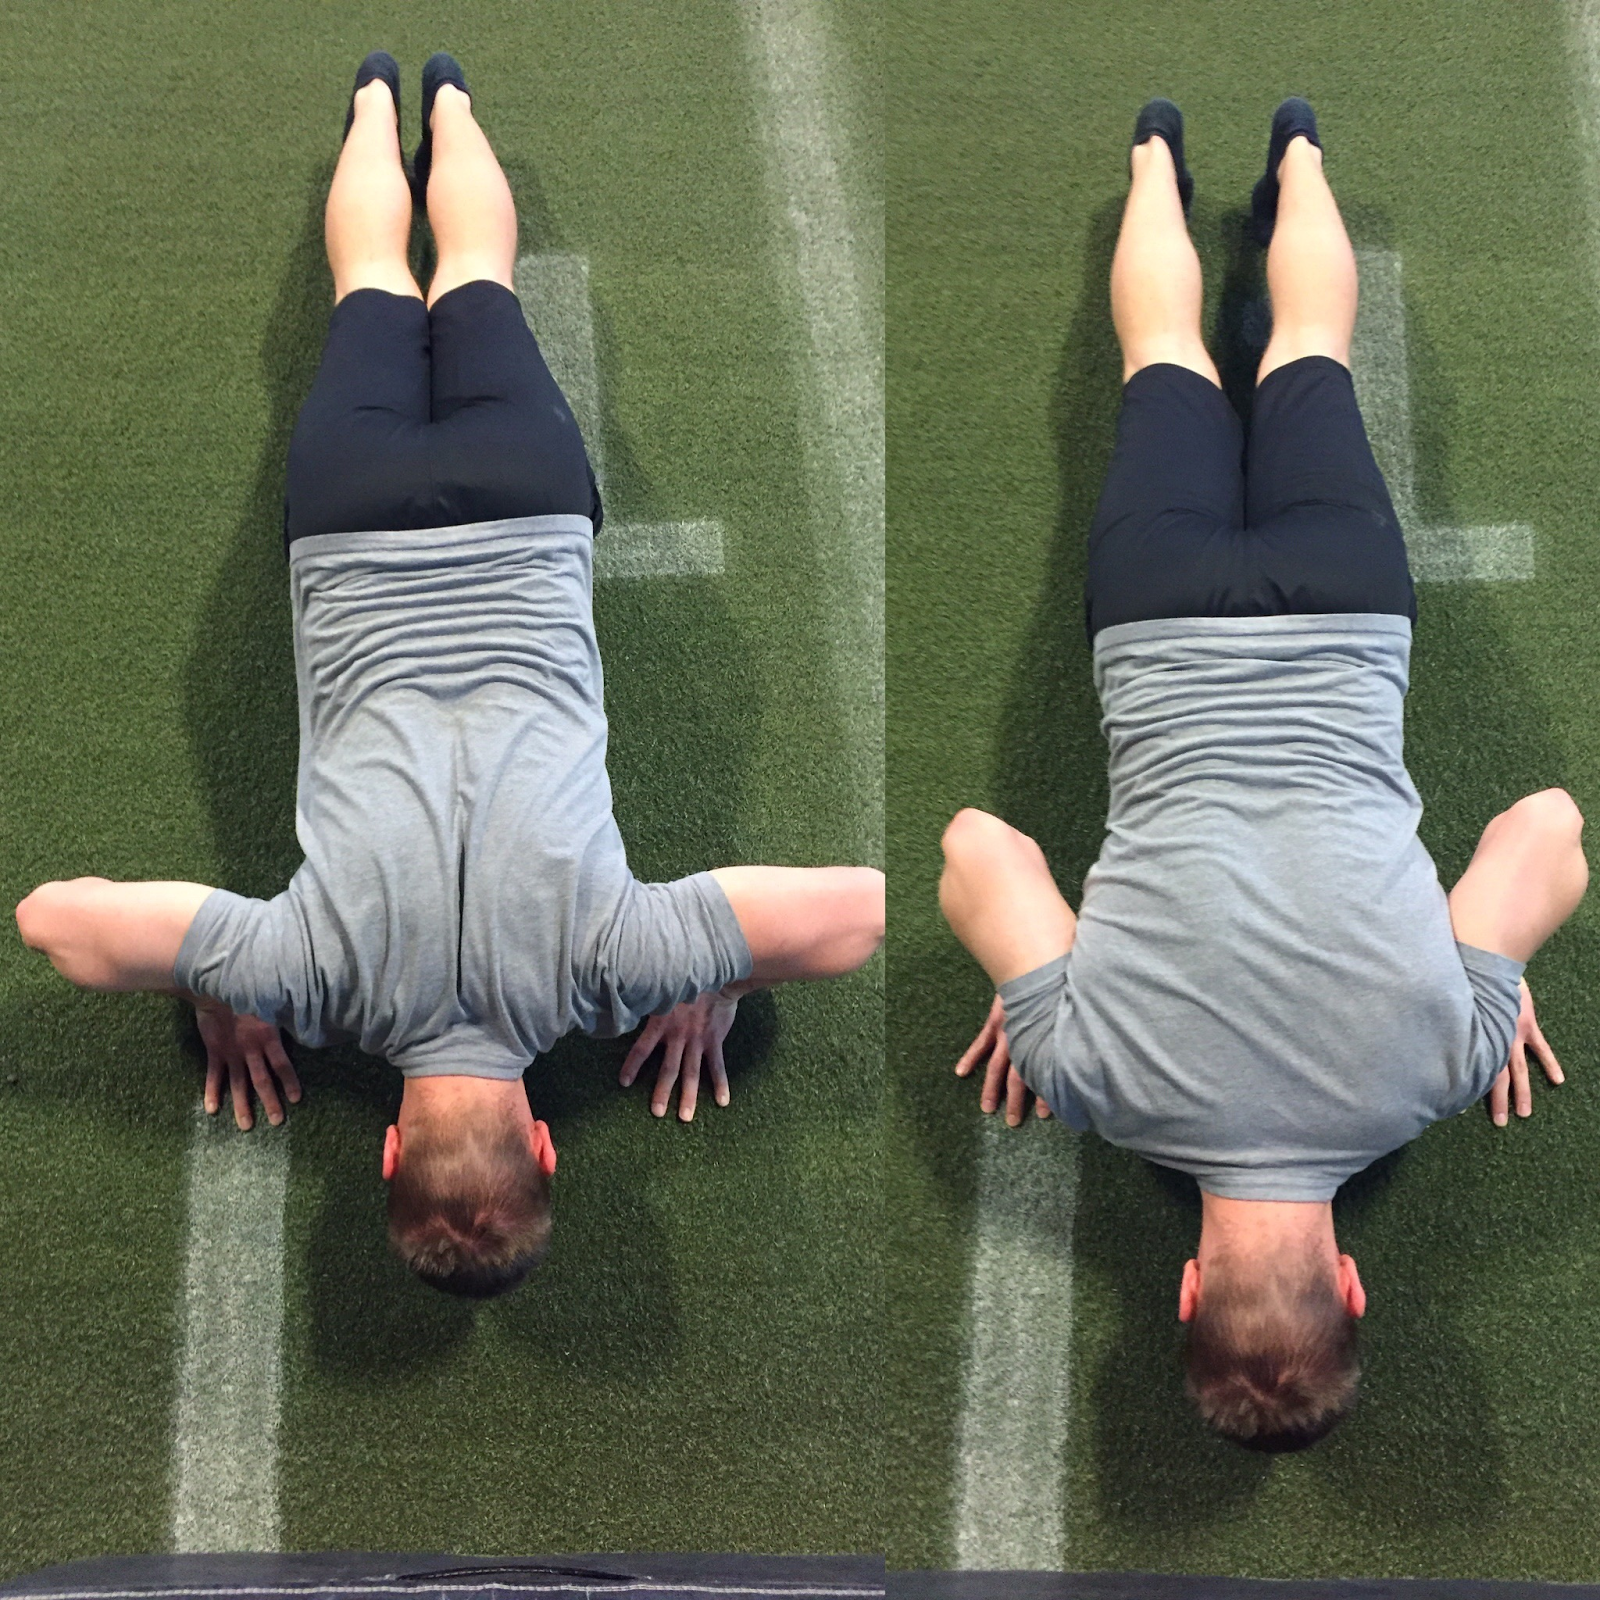
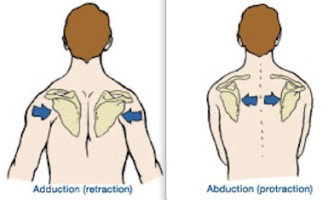
The other key point we’re looking for is good shoulder mechanics, which can be simplified into two fundamental things: close elbows and retracting shoulder blades. The first is something we preach all the time; having your elbows stacked over your wrist and close to your body (right) will allow the force of the push up to be distributed across the triceps, deltoids, and pecs. When your elbows start flaring out (left), it reduces the load on your triceps and begins to dump it more into the shoulder joint rather than the surrounding musculature. This is another poor pattern that will reduce the efficacy of the exercise as it diminishes your muscles’ ability to act on your joints.
Tying into the shoulder joint, your scapula should be coming together (retracting) as you lower your chest to the floor. This retraction of the shoulder blades provides stability for the entire shoulder girdle and prevents poor positioning of your upper arm. When your scapula don’t retract, it allows the shoulder to dump into a forward position that will put more pressure directly on the joint. At the bottom of the push-up, your upper back should always be as tight as it can possibly be; that tension will provide a solid foundation to press from. When you press yourself back up, keep in mind the shoulder blades will not stay retracted, but instead come away from each other at the top of the rep.
The bottom of your push-ups should look like the left side,
while the top should look more like the right.
Given all of the musculature that push-ups incorporate, there’s several areas that may be limiting you in your quest to get better at them. And that’s okay. Regardless of what your limitations may be, you have the tools to improve yourself. Step one is to begin practicing with the solid mechanics we’ve discussed above. It may be a humbling experience if you’re not quite as good with better technique, but in the long run you will be better for it. Remember, Batman never would have rehabbed his literal broken spine without a really solid plank in his push-ups.

Batman hitting some reps in the The Dark Knight Rises.
He uses a wider hand position than I’d like, but he can do
that because he’s BATMAN.
In Part 2 we will discuss different progression options and how to actually implement push-ups into a program. Until then, start trying to do your push-ups better than you currently do, and feel free to comment with any questions or concerns below. I will respond. Probably. You can also use your email to subscribe on the right side of the page. Talk to you all next week.
Why are batman's elbows facing perpendicular rather than parallel to his body? Olivia's Office memes were better!
ReplyDeleteGood stuff
ReplyDeleteGreat post.
ReplyDeletemydigoo.com