“There are no such thing as girl push-ups and boy push-ups; there are just push-ups and not push-ups.” -Kyle Clayton
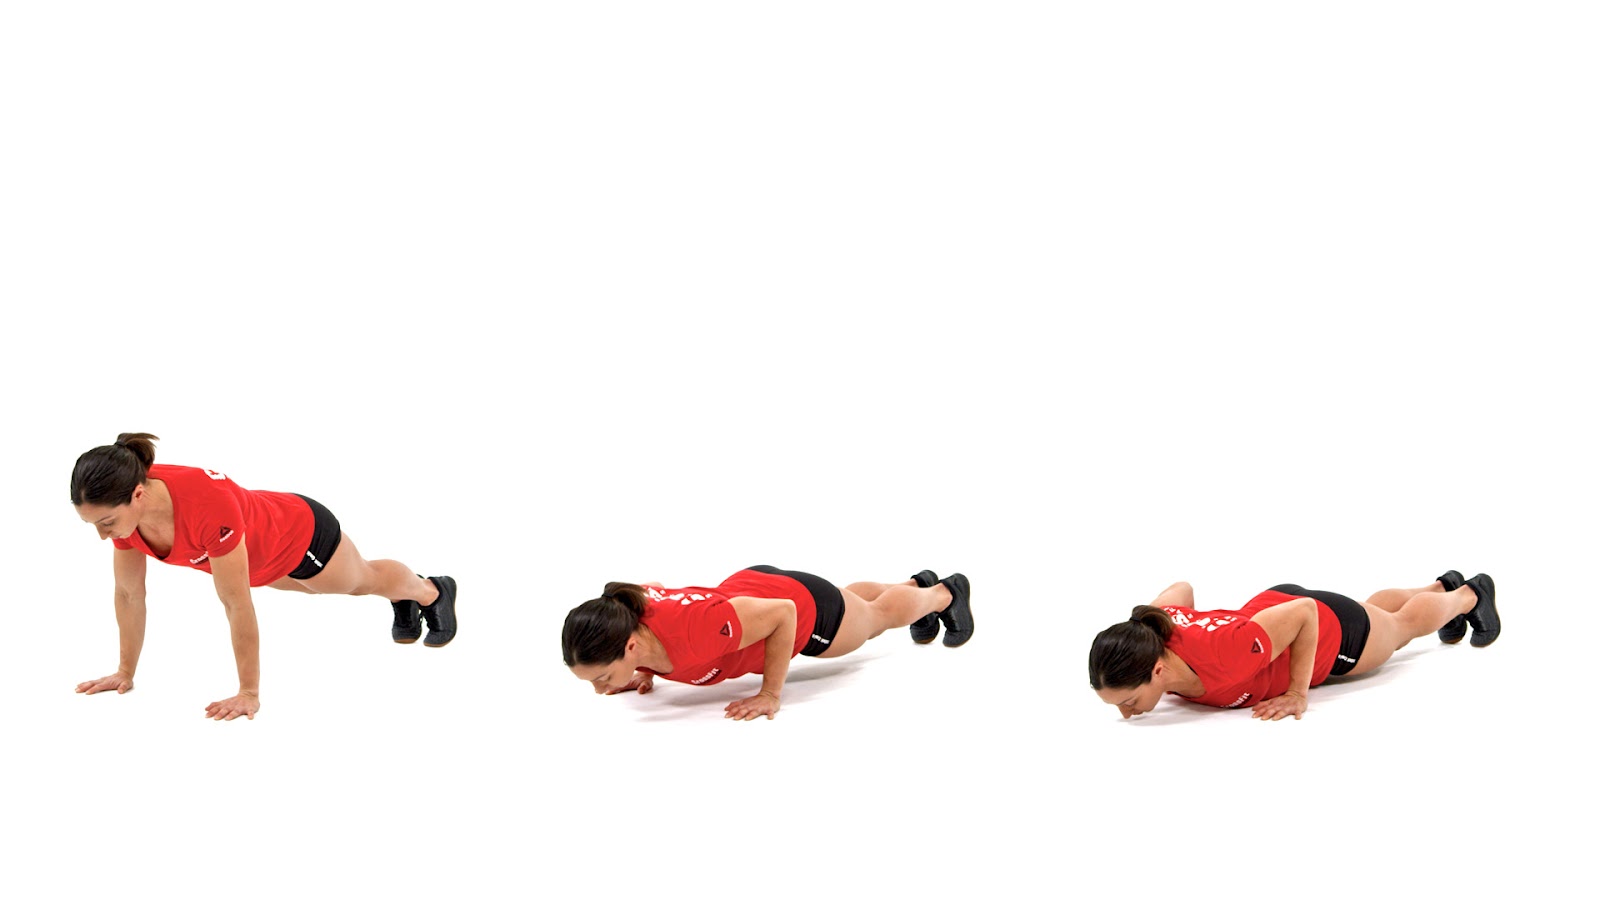
Now that you that you have a solid understanding of the push-up, it’s time to decide on a plan that’s right for you. Two of the common themes in all of these are frequency and progression. Push-ups must be done often enough to apply significant stress and in a manner that is progressively more difficult. If you’re not improving, it is likely because you’re missing one of these two variables.
For an easier to absorb video version of a push-up progression, you can take a look at a series Fitwell did a few years ago starring former instructor Kyle.
Make your selection depending on your current starting point. Below you’ll find different progressions based on varying scenarios.
Individual can’t do a push-up or negative on the floor: 3 to 5’s
The most readily accessible solution is to elevate the hands; allowing yourself to practice a perfect plank while in motion. You could utilize a ledge until you progressed far enough to try a negative on the floor. A very simple progression on the wall is to gradually build from sets of 3 reps to sets of 5 reps. Once multiple sets of 5 are achieved, you’re ready to reduce the height of your elevation slightly and restart the rep scheme. An example of what this might look like over the course of one month is written below:
Rest 2-3 minutes between sets
|
Monday
|
Wednesday
|
Friday
|
Week 1
|
3x3
|
4x3
|
5x3
|
Week 2
|
2x4
|
3x4
|
4x4
|
Week 3
|
1x5
|
2x5
|
3x5
|
Week 4
|
3x3 (at a lower height)
|
4x3
|
5x3
|
This particular example consists of 3 days of push-ups per week. Each one is relatively low volume but the frequency of exposures is high enough to continue development. There is also a clear progression in sets or reps every single session.
This same model could also be run 2 days a week, but the number of sets could be increased to help provide adequate stress. Regardless of how many days per week you choose, the idea is to very gradually adjust your reps from 3 to 5. Moving down in height of elevation overtime is the key. When you get comfortable enough with this, you’re ready to move to the floor and try negatives.
Individual can’t do a push-up but can do a negative: Singles
As soon as you feel capable of doing a push-up negative, meaning you can lower yourself down to the bottom of a push-up in a perfect plank, you should begin to incorporate them into your program. While I’ve never implemented this movement entirely alone, I think you could develop a push-up doing nothing more than negatives. They are genuinely that effective at getting you to support your own bodyweight. The basic idea with negatives is to focus on progressing time rather than reps. Assuming 2-3 days of push-ups per week, a basic progression would look something like this:
Week 1: 5x1 @ 2-3 seconds
Week 2: 5x1 @ 3-5 seconds
Week 3: 5x1 @ 5-7 seconds
Week 4: 5x1 @ 7-9 seconds
Week 5: 5x1 @ 10 seconds
Your progression may not look exactly like this, but as long as there is some time change week to week you will continue to get better. Typically, when you get to the point when you can do a 10 second or longer negative, you’re ready to add some difficulty to the exercise.
Individual can do a 10 second negative: Pause Negatives and Half Reps
Continue doing negatives, but add a brief pause in the most difficult portion of the movement. For most people, that will be a few inches off the floor. The pause negative can be progressed in the same manner written above, but this time increasing the amount of time you spend in the stopped position.Also begin to incorporate half reps. To do a half rep, start in a perfect plank, lower halfway down, and then press yourself back up. I would not recommend doing solely half reps as they do not help build strength from the bottom, but replacing one negative day a week with half reps can be helpful.
Day 1: Push-up Negative 5x1 w/ 3 second pause
Day 2: Half Push-up 5x3
Day 3: Push-up Negative 5x1 w/ 3 second pause
The above progression can be run until you are capable of doing a single push-up. There’s no definitive marker for when this happens, but if you’re capable of doing a 10 second pause negative, then it’s probably time to at least give a full push-up a try.
Individual can do 1 push-up: Increasing sets and reps
Once you can do one, the formula for continually improving push-ups becomes fairly simple. You will either add sets or add reps every single time you do them, as with the first example. The key is progression. I see a number of people regularly stuck at the same number of push-ups wondering why they aren’t getting better. If you take nothing else away from this post, then let it be this: doing the same thing every single week will keep you exactly the same as you are now.
Beyond Push-ups
There comes a point where simply adding sets or reps isn’t entirely sustainable. That’s okay because no single method will work forever, but determining where to go from this point depends on your goals. Much of this leaves the scope of this post, but below are a few potential options that may be helpful based on what you want to accomplish.Getting Stronger/Building Muscle:
Start doing any of the following exercises in place of or in conjunction with push-ups.
- Bench Press
- Incline Bench Press
- DB Presses
- Floor Presses
- Dips/Ring Dips
- Tricep/Chest/Shoulder isolation exercises
Staying Healthy:
Incorporate exercises that challenge your shoulder stability and power further, such as:
- Ring Push-ups
- Front Supports
- Dips/Ring Dips
- Glider Disc Push-ups
- Ballistic Push-ups
Getting Closer to 1500 Push-ups:
Increase frequency of push-ups and progress total number of reps done in a day. Again, this leaves the scope of this post, but 100 push-ups in a day is a good starting point. Progress reps week to week or month to month from there.
If you have questions about implementing any of these, please comment below or ask me in person (preferably comment cause you know how much I love some comments).